![]()
We have recently published an article (in Polish) about ransomware malware (mainly WeelsOf) spreading in Poland. This kind of ransomware was initally mentioned on the abuse.ch blog: https://www.abuse.ch/?p=3718. It demands 100 Euro or 500 PLN in order to unlock our computer. We also published a UKash code generator that was suppose to fool malware and unlock our computer. Since then, we have encountered versions of this ransomware that simply did not unlock the computer no matter what kind of code was submitted. Below, we have compiled a few tips, both for advanced users and beginners, on how to remove ransomware, or malware in general. They should work even in cases when the computer will not boot.
Malware very often adds itself to the list of applications that start when operating system boots up. By doing so, it makes sure that when a user removes it during the system run, it will infect the machine again at another boot. The only solution is to prevent software from running at system start.
Below we present two methods of malware removal. The first one is to try and run the computer in safe mode and then use a free tool to inspect our system. The other one is to run the computer from a Rescue CD provided by one of the antivirus vendors. This is a method that one of our readers checked and recommended.
METHOD 1: SysInternals Autoruns and Safe Boot
Firstly, we should prepare an USB disk with unpacked SysInternals Autoruns (it is available from Microsoft: http://technet.microsoft.com/en-us/sysinternals/bb963902.aspx). On this USB drive we should have four files:
1 2 3 4 | Autoruns.chm Autoruns.exe Autorunsc.exe Eula.txt |
Safe Mode with Command Prompt
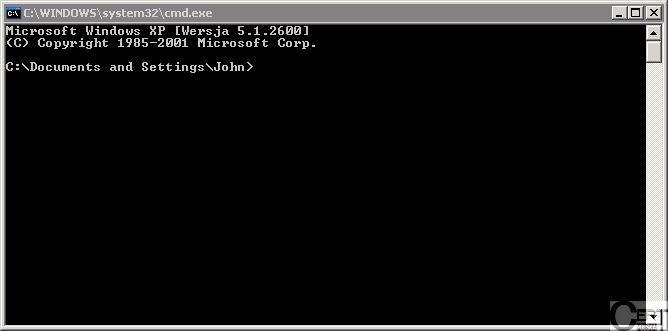
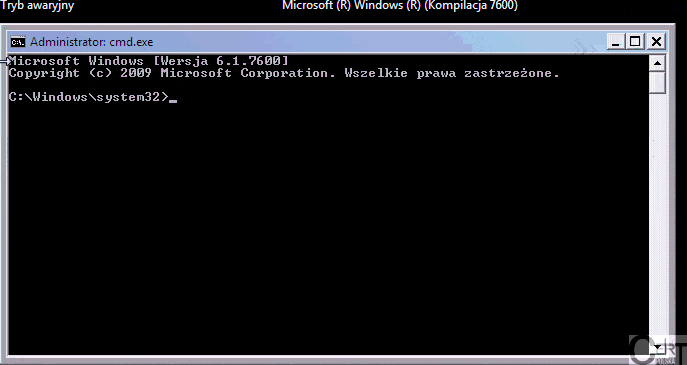
| First thing to do when our computer does not boot up is to try to run it in Safe Mode with Command Prompt (not in the regular Safe Mode – this may not work!). We do this by switching on the computer and pressing F8 just when Windows starts (before the boot up logo). Next, using arrows, we choose the “Safe Mode with Command Prompt” option. |
After running the computer in Safe Mode with Command Prompt we will see a screen similar to the ones below (left is Windows XP, and on the right is Windows 7):
|
|
|
Next we should plug in the USB drive prepared before. Because we do not have access to the graphical interface, we must identify the USB drive letter from a command line. To do this, we issue a command:

In this case the USB drive is present under the letter
.
Now we write that letter with a colon. In our case, the USB drive is associated with the letter
, so we write
and press [ENTER] just like we can see on a picture below:

Now, we should run the application copied to the USB drive by typing
and pressing the [ENTER] key.
After this, we should see the main windows of the autoruns tool. This should be similiar to the picture presented below:
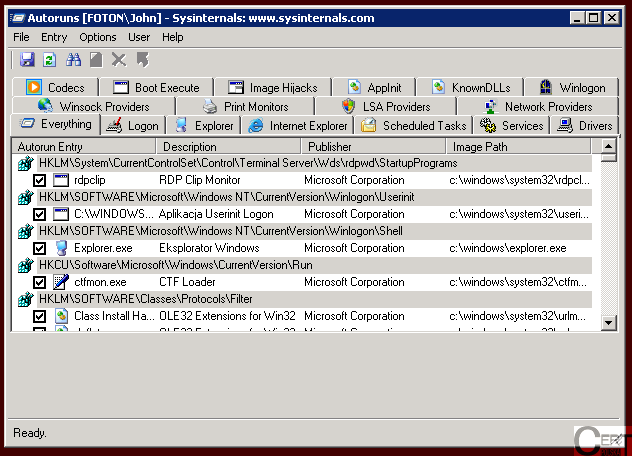
As we can see, this application is very complex. It lists all the autorun entries it could find on our machine. We will be only interested in two tabs, on which we can find places in which malware usually resides, namely:
and
.
Identification and removal of malware
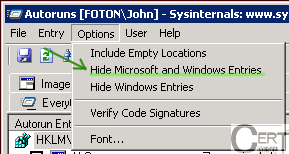
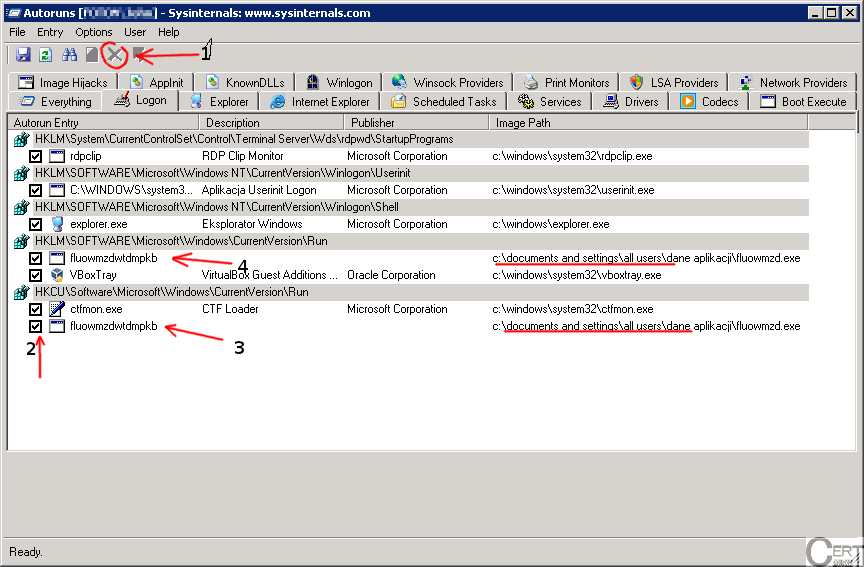
| In order to narrow down the list of suspicious entries, we should turn off all entries associated with Windows or Microsoft software in general. In order to do so, we must click on the
<span class="text">Options</span> menu and choose <span class="text">Hide Microsoft and Windows Entries</span> (you can see it on a picture on the right). |
 |
One of the most standing out features of the malware is the file location (column
). If this entry starts with
, we can with a high probability state, that this is indeed a piece of malware. Another feature is the name of the entry (first column, named
). Malware often uses random file names. For example, we can see ransomware entries in the picture below. They are labelled with
and
. After locating these entries we can deactivate the entry by clicking on a box (marked with
) or remove it permanently by clicking on a
. WARNING: If we are not sure about our identification, we should always deactive the entry, rather than remove it. The effect will be the same – application will not run during the next reboot. However, if we deactive the entry, we can activate it again in a later time, if it was a benign application.
Where to look for a virus?
Other places that are most commonly used by malware are:
In a tab called
:
Benign entry in a
key:

After being infected by malware this entry looks like in the picture below:

Another example: two entries in the
key, the green one is a benign entry while the red one is created by malware:

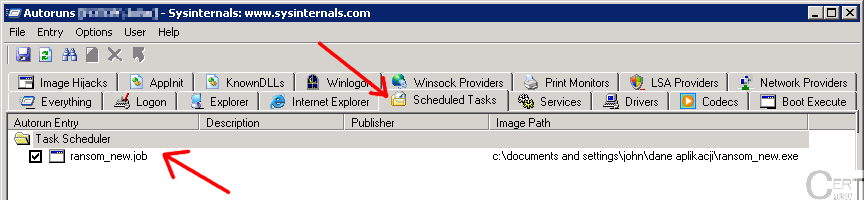
The last example is the
tab:
METHOD 2: Rescue CD with antivirus
Many antivirus vendors create and freely distribute Rescue CDs, which allow users to run their computer with an alternative operating system. After such an operation, we can scan our system for any malware that is present in the antivirus database. On these CDs we can also find other useful tools, e.g. registry editor. If we do not have the CD/DVD writer, we can download a version crafted specifically for the USB drive. Couple of the most popular such solutions are:
- AVG Rescue CD
- Avira AntiVir Rescue System
- BitDefender Rescue CD
- Dr Web Live CD
- F-Secure Rescue CD
- Kaspersky Rescue Disk 10
- Delete
- F2
- F1
- F8
- F10
- F11
- F12
One of our readers informed us about the easiness of use of the CD provided by Kaspersky. Because it is indeed a very user-friendly and graphical solution, we decided to use it for this description. It should be noted that all of the aforementioned solutions provide the same basic functionalities, hence it usually does not matter which CD we will use.
Installation
If we have a CD/DVD burner, we can simply download an ISO image (using the links provided above) and write it to the CD. We must make sure that we choose to record a CD from the ISO image. Then, we should be able to run our machine using the alternative operating system from the CD.

Of course, there are other key combinations used for this. To get the detailed instruction, we should look in our motherboard manual. Next we go to the “Boot” tab (if we are in BIOS) and choose a CD/DVD (if we recorded a disk) option or the “Removable Drive” option (if we wrote data to the USB drive).
Scanning
After the boot up, we must press a key within a 10 seconds. Then we should choose a language (”English”, of course) and press Enter. Next, we should accept the License Agreement by pressing “1″. On the next screen we choose “Kaspersky Rescue Disk. Graphic Mode” option and, after a short start up procedure, we should see a screen similar to the one presented below. We should move to the “My Update Center” tab.
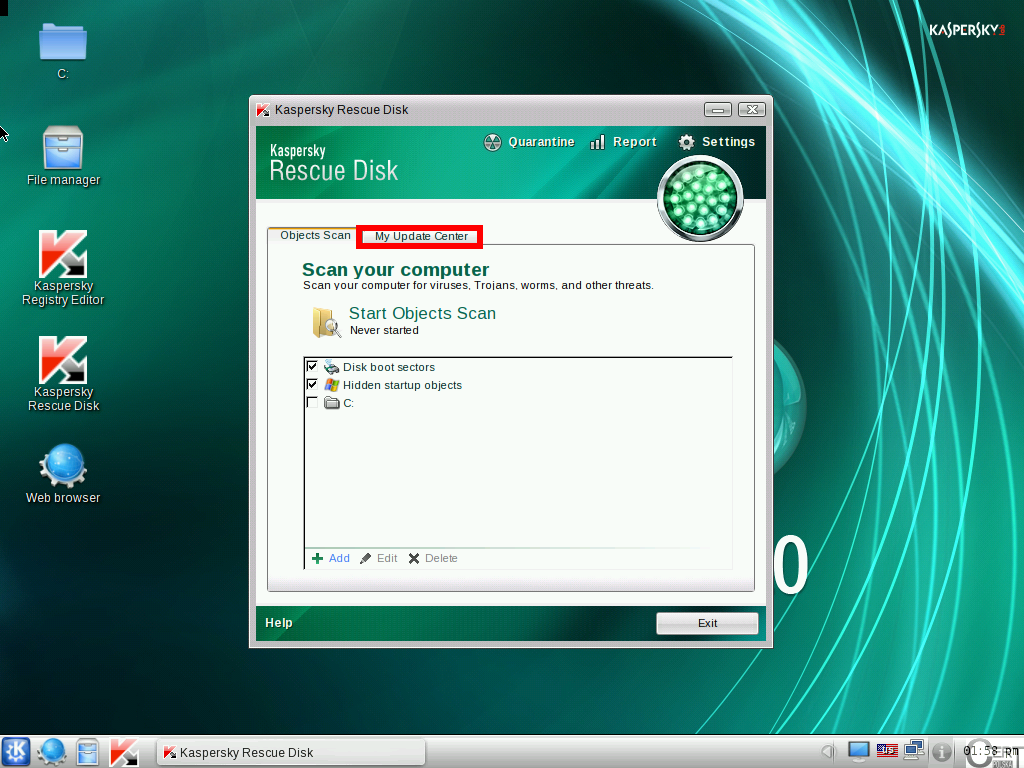
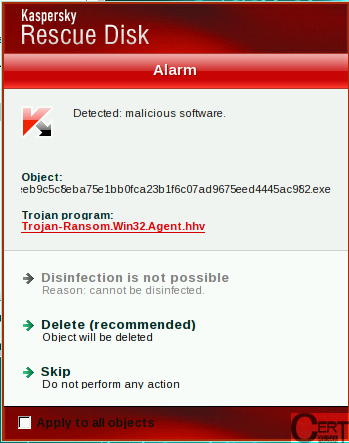
On this tab, we click the button labeled “Start Update” and, after some time when the progress reaches 100%, we receive an information that our virus database has been updated less than a minute ago. We now move to the “Objects Scan” tab and mark all scan targets and press “Start objects scan”.
 |
|
When nothing works
The methods described above should, in most cases, allow us to remove the malware from our computer. However, if this is not the case, or we are afraid that we can lose valuable data, we recommend contacting a specialized computer service that should be able to remove the infection.
